Image Watermark

How to Place Watermark on Multiple Images?
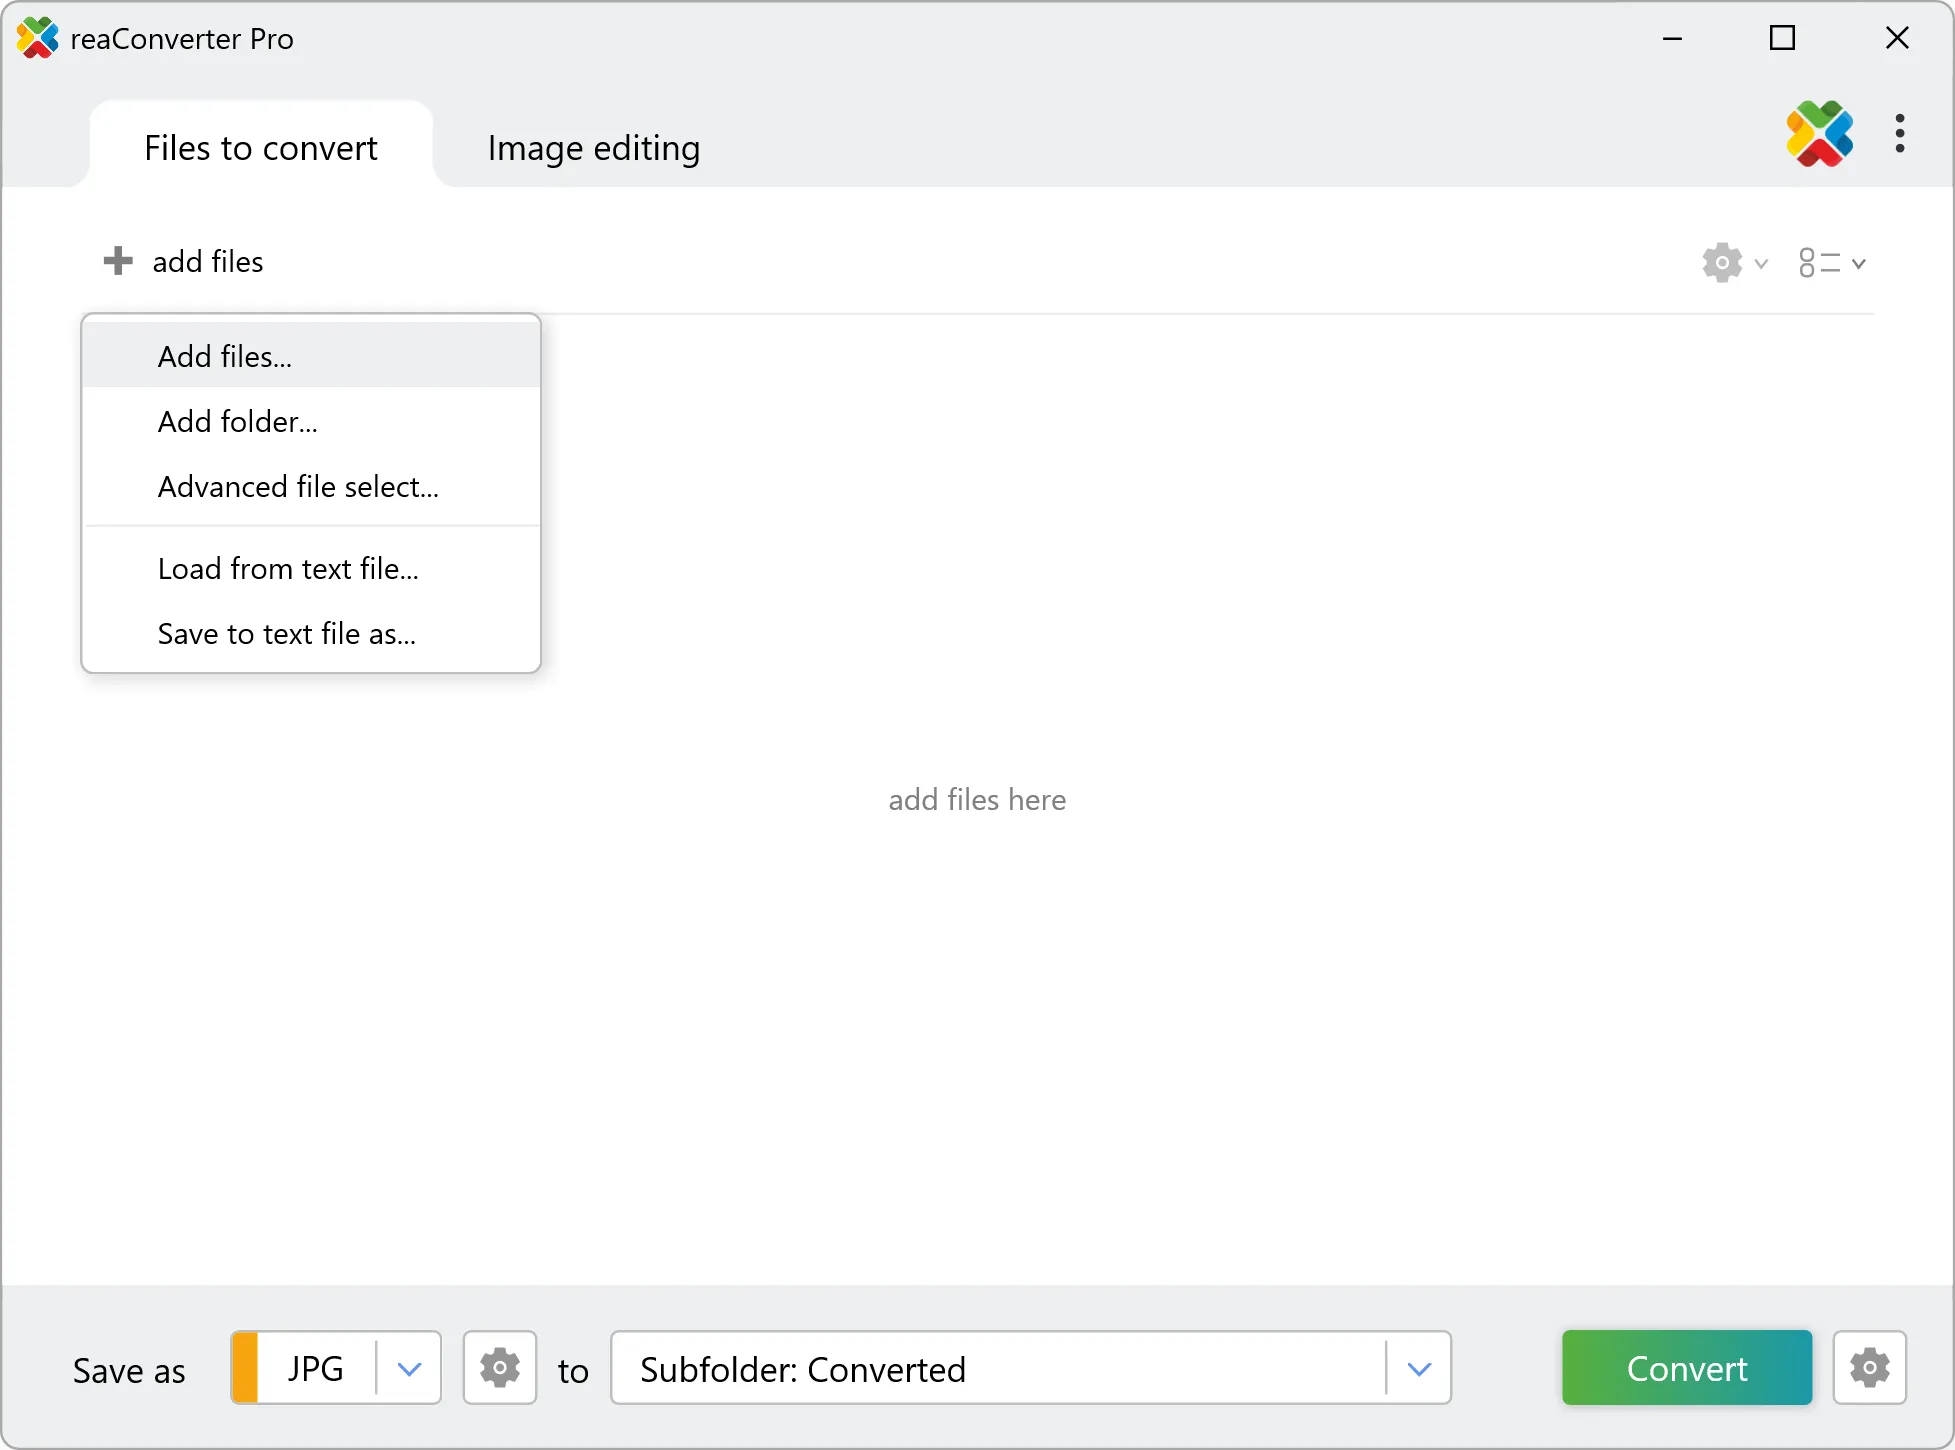
1. Open Images
Open one or more images you intend to watermark. Select them one by one, add entire folders or use the handy drag-and-drop tool.
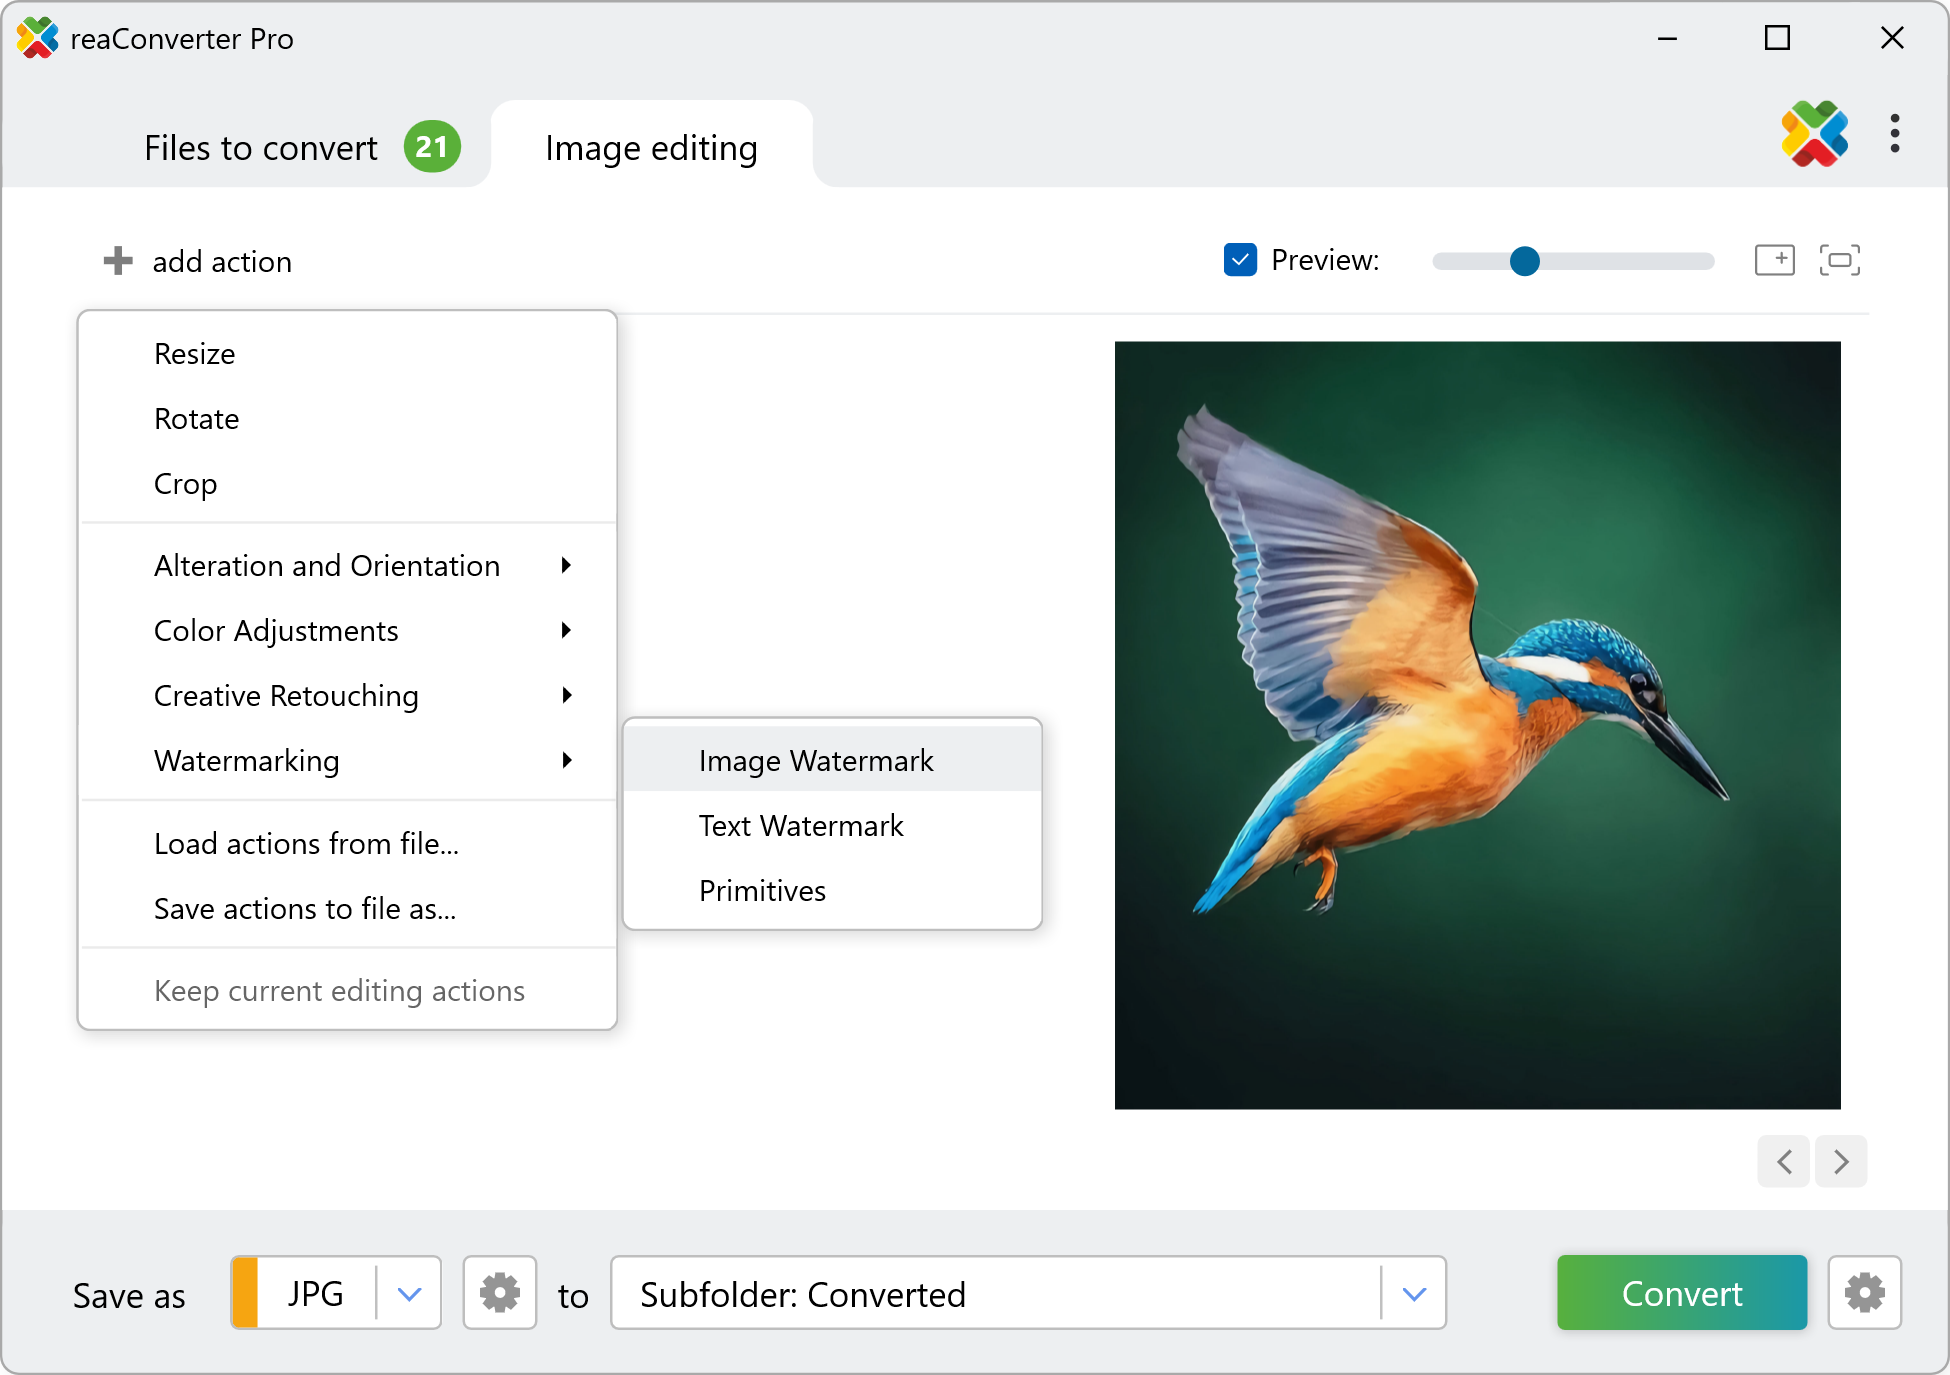
2. Add Image Watermark Action
In the Image editing tab, go to Add action → Watermarking → Image Watermark
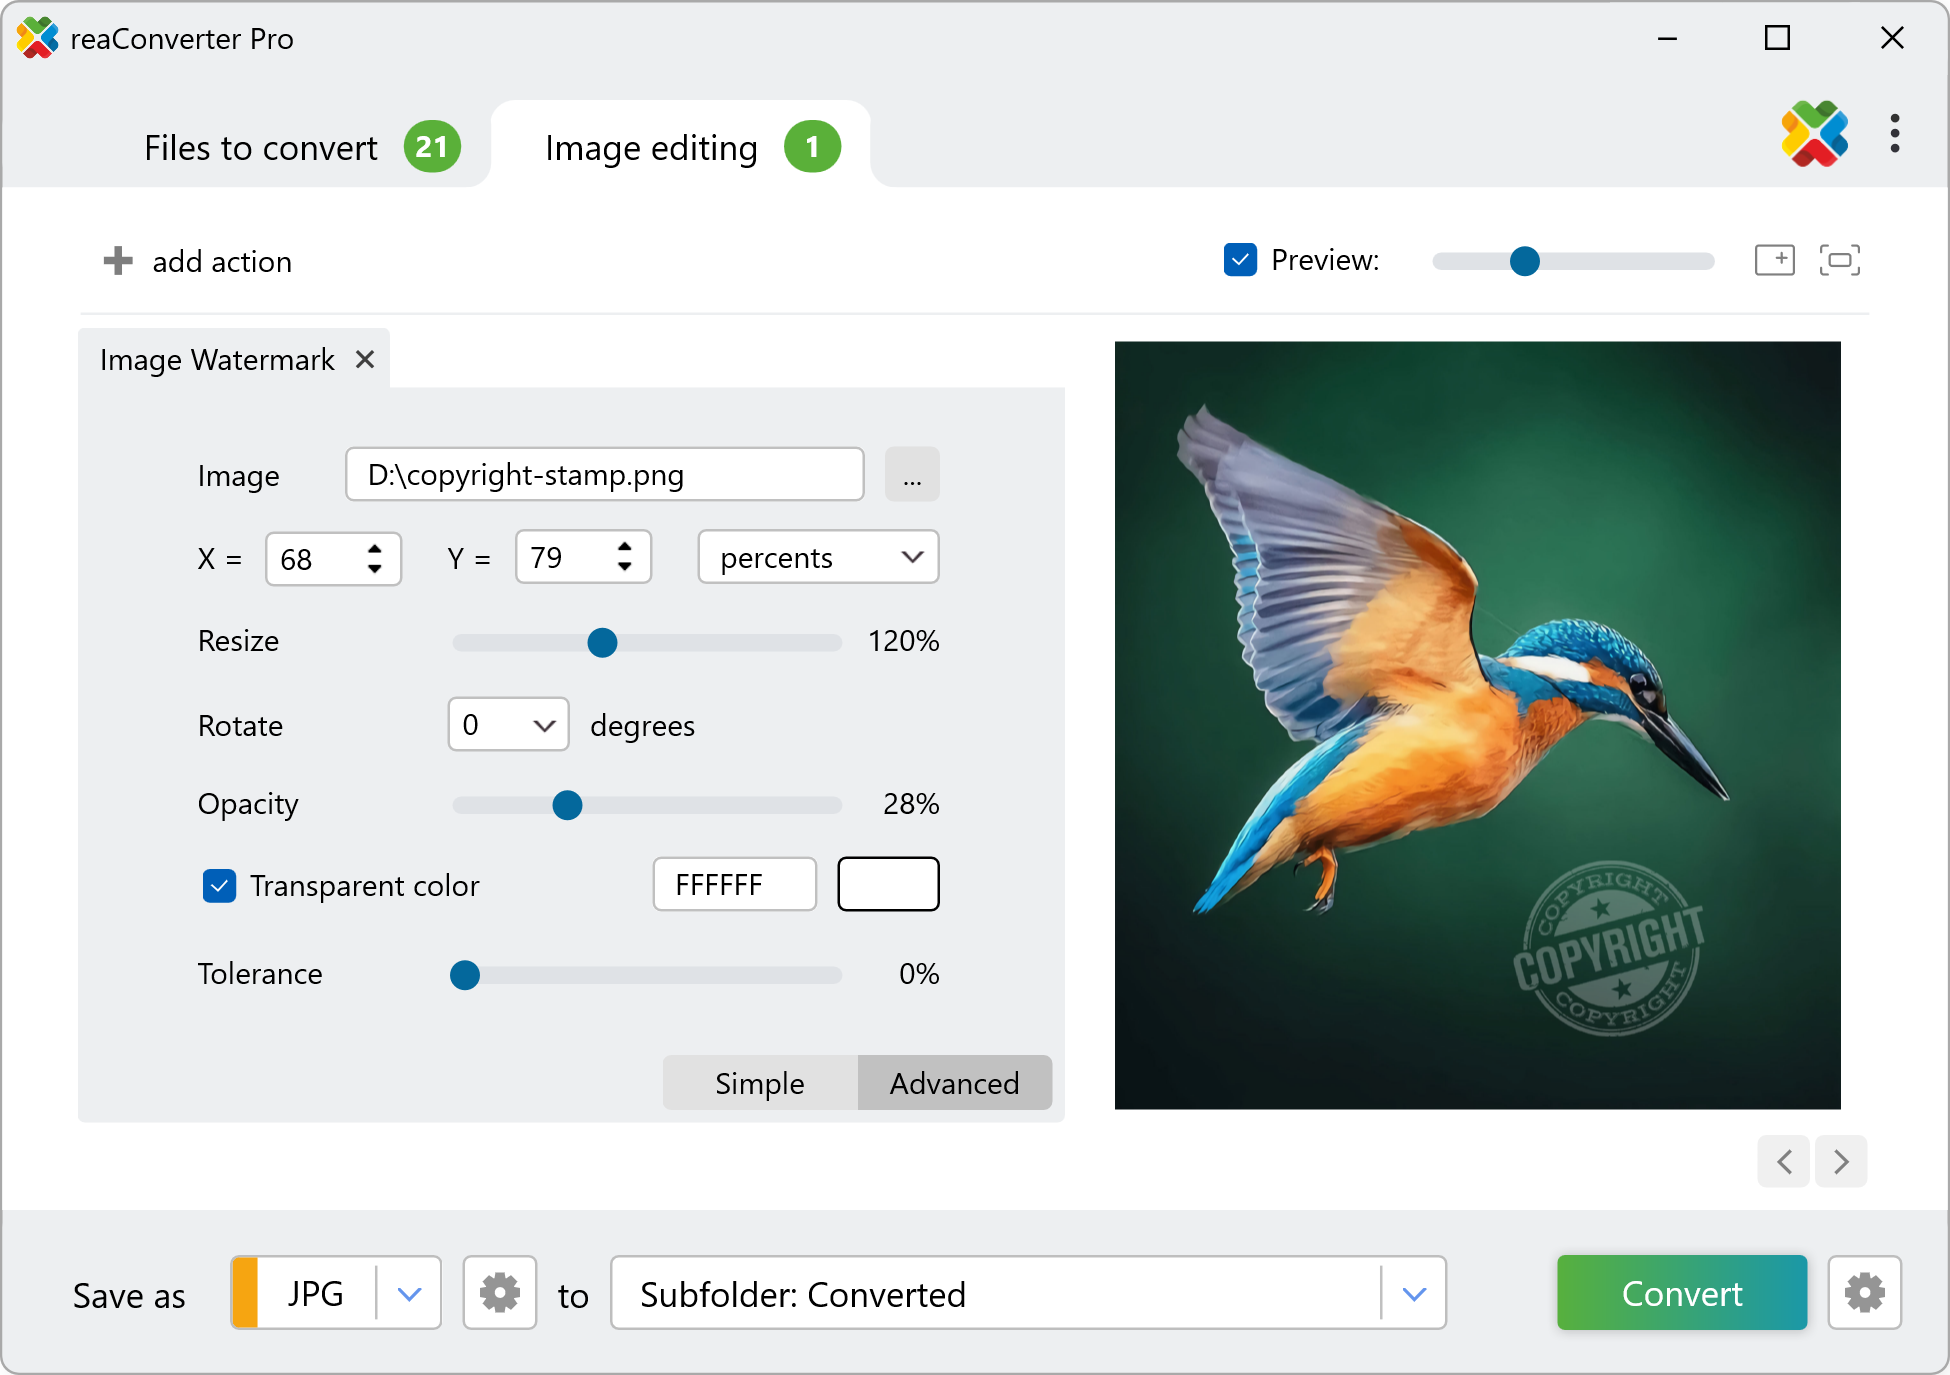
Here you can opt for the simple watermarking interface, where you just add the desired watermark image and the coordinates defining its position on the image, or the advanced one. The latter allows you to resize, rotate and set the opacity of the watermark image, as well as customize the color tolerance and transparency of the watermark.
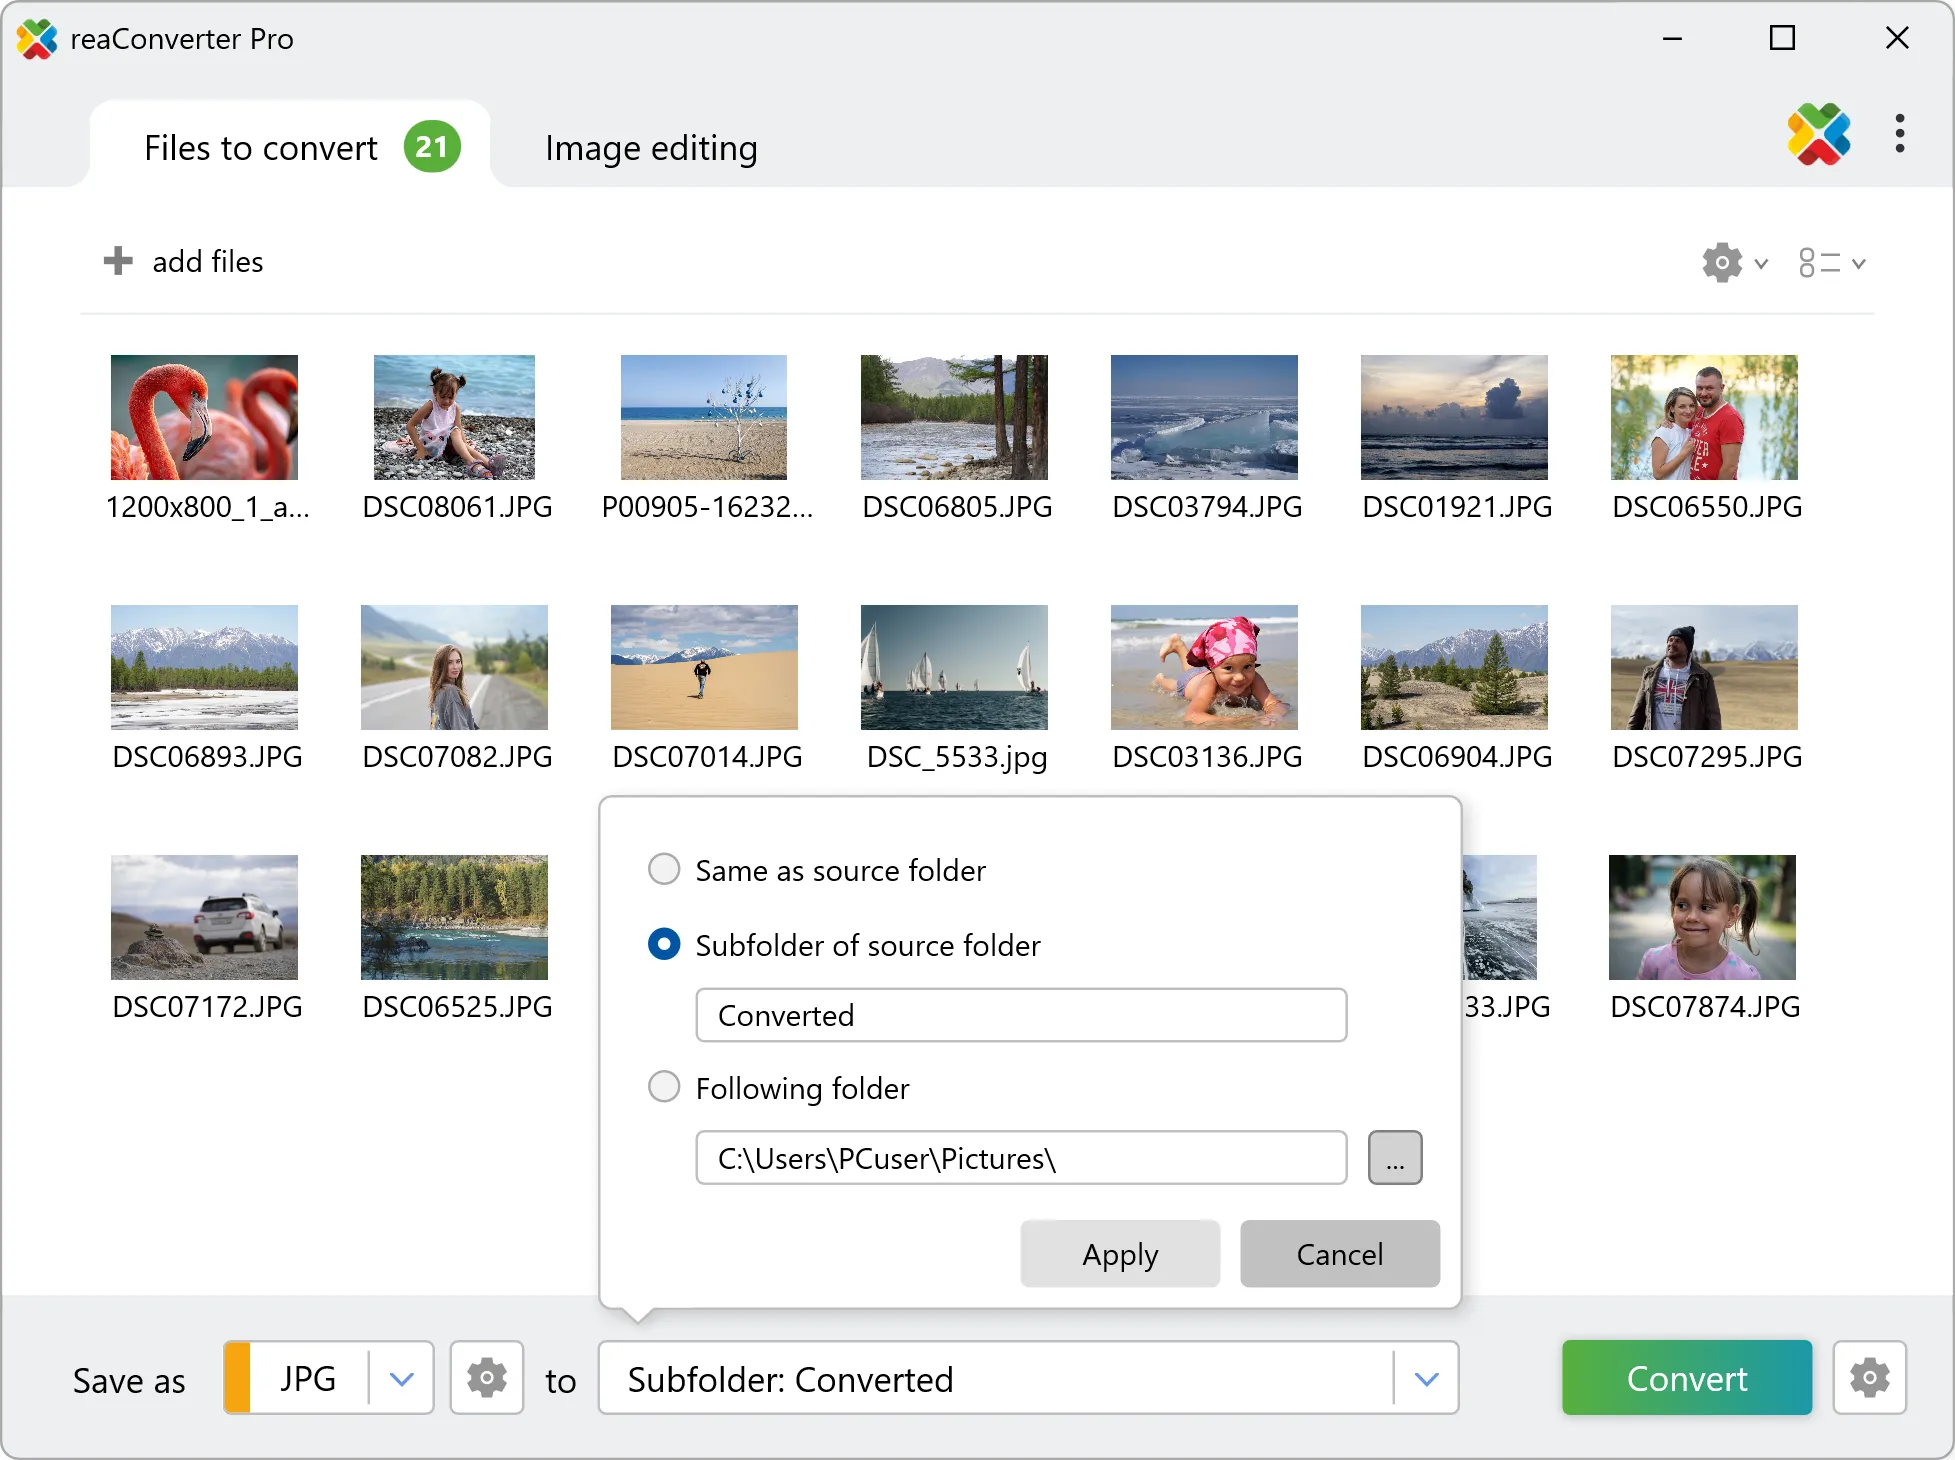
3. Save the Result
Pick a location for your stamped pictures. You can save them locally, in the source folder or in a newly created one. Moreover, you can change their extension by simply choosing new one in the lower part of the screen. reaConverter supports conversion to and from an extensive number of image formats.
Finally, click the Convert button and you will soon be able to enjoy your newly watermarked image files!
Watermark images on your PC
The fast and easy way to stamp multiple images is to use reaConverter. The software works completely offline, keeping your files safe and private.
Watermark images with command-line tool
You can also watermark images with command-line , either manually or through automated scripts. reaConverter Pro includes a command-line tool called cons_rcp.exe — an advanced feature designed for professional use, available exclusively in the Pro edition.
Watermarking example:
cons_rcp.exe -s "C:\Path_to\input_file.jpg" -o "C:\Path_to\output_file.jpg" -image_watermark p"C:\Path_to\watermark.jpg" pos10x10% op50 rot90 mt

Manual
-image_watermark (adds image watermark)
  Optional parameters:
	  1. Full path to watermark image file (Syntax: p"c:\image.jpg", string with quotation marks)
	  2. Watermark position (Syntax: pos30x30%, pos100x200px)
	  3. Watermark opacity (Syntax: op100, integer from 1 to 100)
	  4. Resize watermark (Syntax: r30, integer from 1)
	  5. Rotate watermark (Syntax: rot90, integer from -360 to 360)
	  6  Make transparent (Syntax: mt)
	  7. Watermark transparency color (Syntax: rgb(66,137,212), hex(4289d4))
	  8. Watermark transparency color tolerance (Syntax: t20, integer from 0 to 100)
  Example:
    -image_watermark p"c:\watermark.png" pos10x10% op50 rot90 mt
You are welcome to contact our technical support when you have any questions about reaConverter.
Discover more